No message inside the card.
Thursday, January 31, 2013
Stitched Lines and Curves #6
Here is the last post on how straight stitches when overlapped can make curves. I used a variegated thread for this stitching.
Tuesday, January 29, 2013
Stitched Lines and Curves #5
Here's another example of how straight lines can make curves when they are overlapped. Enjoy!
No message inside the card.
Friday, January 25, 2013
Key to my Heart
With Valentine's around the corner I thought I would post this stitched card for the occasion. The heart at the top of the key cried out for some stitching so I added it after I did the stamping.
Thursday, January 24, 2013
Rose Celebration
My aunt asked me to help her with a special 90th birthday card for a woman in her sorority. I drew inspiration from the rose symbal of the sorority and from this week's Freshly Made Sketches card challenge. As I love to create hand stitched cards I thought it would be fun to try stitching this design. If you look closely, you will see the glass beads that I have sewn on to the embossed paper. I hope you like it.
Message inside the card:
Happy Birthday
The rose symbal from the sorority.
Tuesday, January 22, 2013
Stitched Lines and Curves #4
Here is another post on the study of how straight stitches when overlapped can make curves. If you haven't had a chance, check out my last post to see the steps I take to make a stitched design on paper.
No message inside the card.
Sunday, January 20, 2013
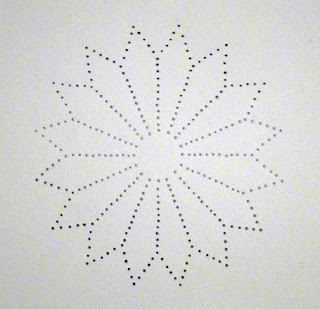
How to stitch on paper - lines and curves #3
This post continues the study on how straight stitched lines when overlapped will form curves when no curves have actually been stitched. This post also shows the progression of a stitched design.
This is the final product.
The first step in creating a stitched design is to poke the holes with an awl. I place my pattern over top of the paper I want to stitch on - I use painters tape to secure the paper while I poke the holes. Painters tape will not leave any marks when you carefully remove it from your paper. If you are very careful when you poke the holes you can use the pattern again for another design.
Then I start stitching. I typically use DMC floss and match the colour of thread to a paper colour. You need to use a very thin needle so as not to enlarge the holes when you stitch.
You can see the progression of stitches and and how they overlap. You simply continue overlapping the stitches and you will end up with a petal like you see in the first picture.
I hope you have enjoyed the steps I take to make a stitched design on paper.
Friday, January 18, 2013
Stitching Lines and Curves #2
This is the second design in the study of stitching on paper and how straight lines can make curves. Depending on where you start and finish your stitch will dictate the design you are going to create. If you look at the bottom point of every curve you can see that the straight stitch goes up and one hole over. The next stitch will overlap that straight line to eventually form a curve and then in the end a flower. In my next post I will show some photos of the stages of stitching straight lines into curved designs.
No message inside the card.
Thursday, January 17, 2013
Stitching lines and curves #1
My next few posts will be a series of cards focusing on the art of stitching. By following a pattern in a simple design of straight line stitches, curves can appear even though I haven't sewn a single curve. The layering of each stitch creates the illusion of a curve. I hope you enjoy this study of lines and curves.
No message inside the card.
Tuesday, January 15, 2013
A Canadian Moose
I have a friend who wanted a "Canadian" thank you card. She travels around the world and wanted something special that had that "True North" feeling. I thought a moose and some red maple leaves would do the trick. Hope you enjoy my stitched moose card with a bit of Canadian humour inside.
Message inside the card:
eh!
Message inside the card:
eh!
Thursday, January 10, 2013
Stork Delivery
My daughter's teacher just announced her pregnancy so I thought this would be a perfect hand stitched card for the occasion. For design inspiration I looked to this week's Freshly Made Sketches card challenge.
No message inside the card.
No message inside the card.
 |
| Freshly Made Sketches #68 |
Tuesday, January 08, 2013
Be Mine
Happy New Year! Now that Christmas is over it is time to start thinking about the next holiday - Valentine's Day. It's great to always have something to look forward to!
Message inside the card:
Happy Valentine's Day
Message inside the card:
Happy Valentine's Day
Subscribe to:
Posts (Atom)


